The Only Guide to Tile Contractors
Table of ContentsThe 25-Second Trick For Tile Installation ContractorsThe Ultimate Guide To Tile ContractorsThe Of Tile ContractorsThe Facts About Tile Installation Contractors RevealedTile Installation Contractors Fundamentals ExplainedWhat Does Tile Contractors Do?Our Tile Installation Statements
Preparing for Grouting Prepare your room for grouting by cleaning up off any type of excess thinset press out as well as in grout joints. An energy knife functions the ideal to clean out the cement joints. Make sure to exchange out your water container consistently, collaborate with clean water as well as utilize a practically completely dry sponge.If you have actually set up a synthetic floor tile, such as glass, ceramic or porcelain, now is a great time to apply a cement launch. This prevents the cement from sticking exceedingly to the surface area of the ceramic tiles. If you are utilizing all-natural rock or encaustic concrete floor tiles, we suggest likewise applying a rock sealer before grouting.
Allow cement mixture slake according to the manufacturer's referral, and also briefly remix prior to application. Maintain open time as well as remedy times in mind as you did for the thinset action. Have a bucket of water as well as a sponge on hand to tidy as you go. tile installation. Begin applying your grout with a cement float.
Some Known Factual Statements About Tile Contractors
Beware not to make use of too much water when cleansing up as it can leach the pigment out of the cement and lighten the shade. Decrease the amount of excess cement on the tile. It is easier to apply cement only to the joints of a large-format tile whereas a tiny mosaic will certainly need to be almost fully covered to load in every one of the joints.
This is an extremely fine covering of cement and also is regular. Allow the grout established up for a couple of hours, and after that utilize a recommended grout haze eliminator and also a dry or nearly dry sponge or cloth. Come with the cement line at an angled to prevent eliminating grout from the joint.
The Best Strategy To Use For Tile Installer

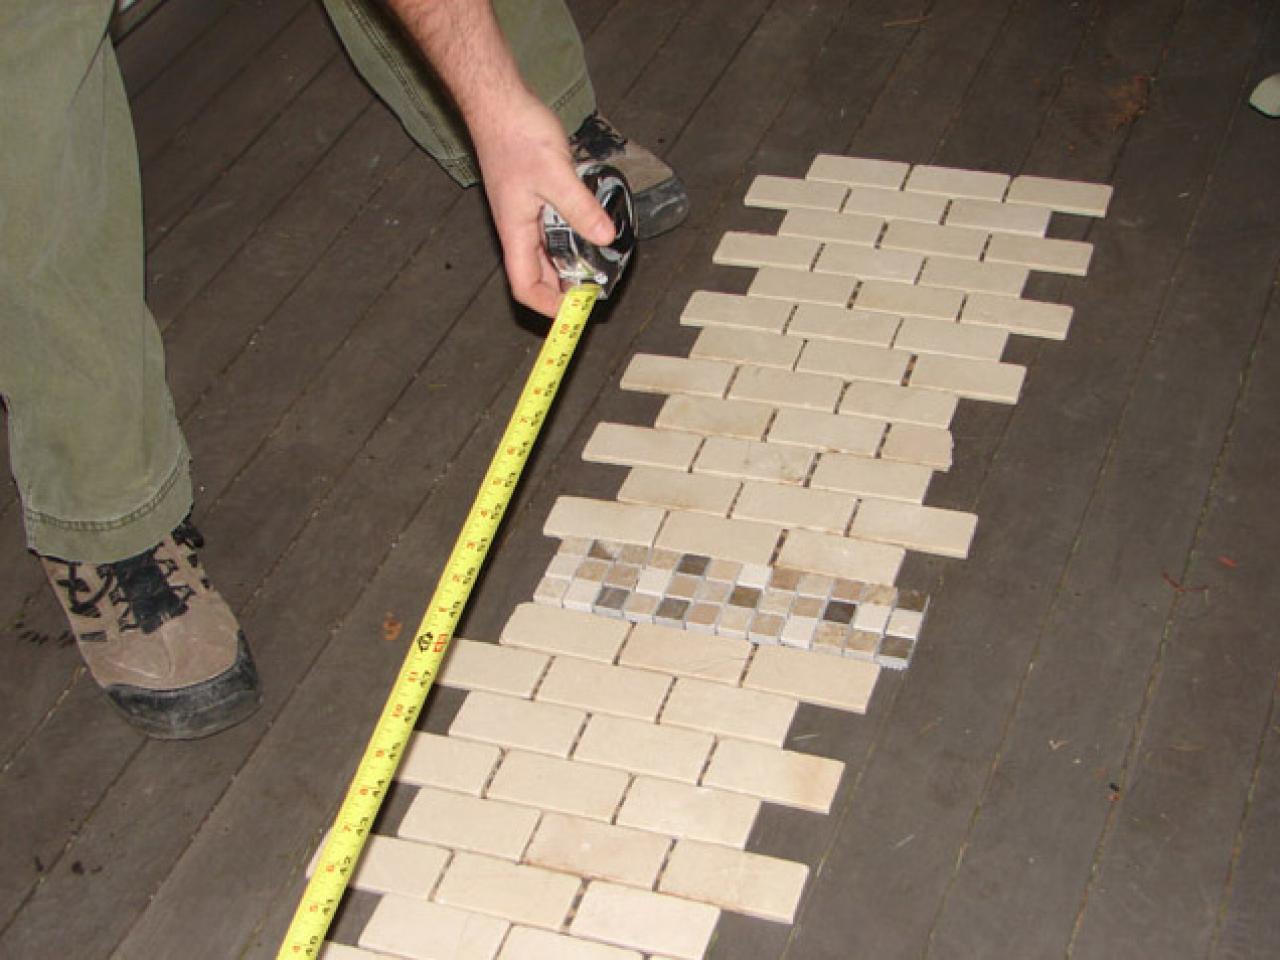
Actions on Exactly How to Lay Tile 1. Tiling a Flooring Overview Pursue a layout that makes best use of the number of whole floor tiles as well as the size of any type of cut tiles. When awkwardly sized ceramic tiles can not be avoided, position them where vanities will cover them later or out of the major view lines from the entrance.
Conserve all of the cuts needing a wetsaw for last. Lease the wetsaw for one day. 2. Dry format Discover the midpoint of each wall surface as well as snap chalk lines on the flooring. The line crossing at the room's facility are the starting point of the floor tile. Lay a row of floor tiles along a straightedge greater than halfway throughout the room.
Some Known Details About Tile Installer
At the area's facility, place a ceramic tile where this article the chalk lines cross with its sides touching the lines. Step from one wall surface (telephone call it important link A) to the closest floor tile edge.
If that measurement is less than 2 inches, go back to the facility floor tile and also relocate far from wall surface A to create a wider cut tile. 3. Dry design, Part II From the facility floor tile, action to the contrary wall (call it B; mark this distance along the ceramic tile row.
After changing the A-to-B line, note the website here center floor tile where it touches the chalk line in between the various other walls (call them C and D). Straighten these marks with the C-to-D chalk line. Repeat the measuring and also readjusting process for walls C and D. Lay a straightedge parallel to the C-to-D line and also against one side of the center floor tile.
The Definitive Guide to Tile Installation
Mix only as much thinset as you can use in 2 hrs. With the level edge of a trowel, spread out a thin layer of thinset (scrape layer) over a 2-by-3-foot location alongside the straightedge. Before the scrape layer dries, use more thinset utilizing the scratched side of the trowel.
Brushing the thinset into furrows allows air to run away as the tile is set. Establish the floor tile Gently lay a floor tile on thinset following to the straightedge.
Utilize this very same strategy to establish each ceramic tile, making one row along the straightedge. Making use of ceramic tile spacers makes sure even joints.
Some Known Facts About Tile Installer.
For straight cuts with waste less than an inch wide, score ceramic tile on snap cutter, after that snap pieces off with nibblers or use a damp saw. To fit a floor tile around an outdoors edge, hold one edge against the wall surface and also mark the ceramic tile where it touches the corner. Pencil a line all the means across the floor tile.
For bent or scribed cuts, make identical slices with the wet saw right into the waste area, up to however not past the line marking the cut. Load the ceramic tile joints with cement After tile collections over night, utilize a margin trowel to scratch off any thinset from the ceramic tile surface area or in the joints.
9. Tidying up the cement Allow the grout to establish for 20 or 30 minutes. It should be firm to the touch prior to you start washing the ceramic tile's surface area. Clean away grout haze with a moist, well-squeezed sponge washed commonly in a pail of tidy water. Once more, wait on cement to haze over, then clean with clean sponge.
The Greatest Guide To Tile Contractors
Thinset mortar is the concrete or bonding representative that attaches floor tile to the floor. Using a thinset mortar mixer, mix with the proper amount of water in a large pail.
A lot of thinset mortars come currently changed. Porcelain tiles should always be applied making use of a modified thinset mortar to achieve the appropriate bond. When installing tile to a wood subfloor, haze or lightly sponge the subfloor with water before spreading out the thinset mortar. Otherwise, the subfloor will certainly take in water from the thinset mortar as well as influence exactly how well your ceramic tiles comply with the flooring.
Take care to blend small batches of thinset mortar so that it doesn't set before you've had a chance to use it all. Do not include water after the thinset mortar begins to set. This will certainly weaken the bond.